JZON FABRICATIONS · ASSEMBLY GUIDE
Storage Drive Rack with 90mm Fan Attachments
A clear, visual guide for assembling the frame and installing the primary PC components of the Storage Drive Rack with 90mm Fan Attachments.
This guide applies to both variants:
- 6 x HDD Rack with 90mm Fan Attachments
- 16x 2.5″ SSD / 8x SAS Cooled Storage Rack – 90mm Fans Attachments
INCLUDED HARDWARE
SSD variant:
48x M3 Screws
HDD variant:
16x 6/32 screws
16x M3 screws
REQUIRED TOOL
PH1 screwdriver
Use a clean, flat work surface.
TIME & DIFFICULTY
10–20 minutes
Easy
ASSEMBLY OVERVIEW
Four clear stages
PARTS OVERVIEW
Identify the main components
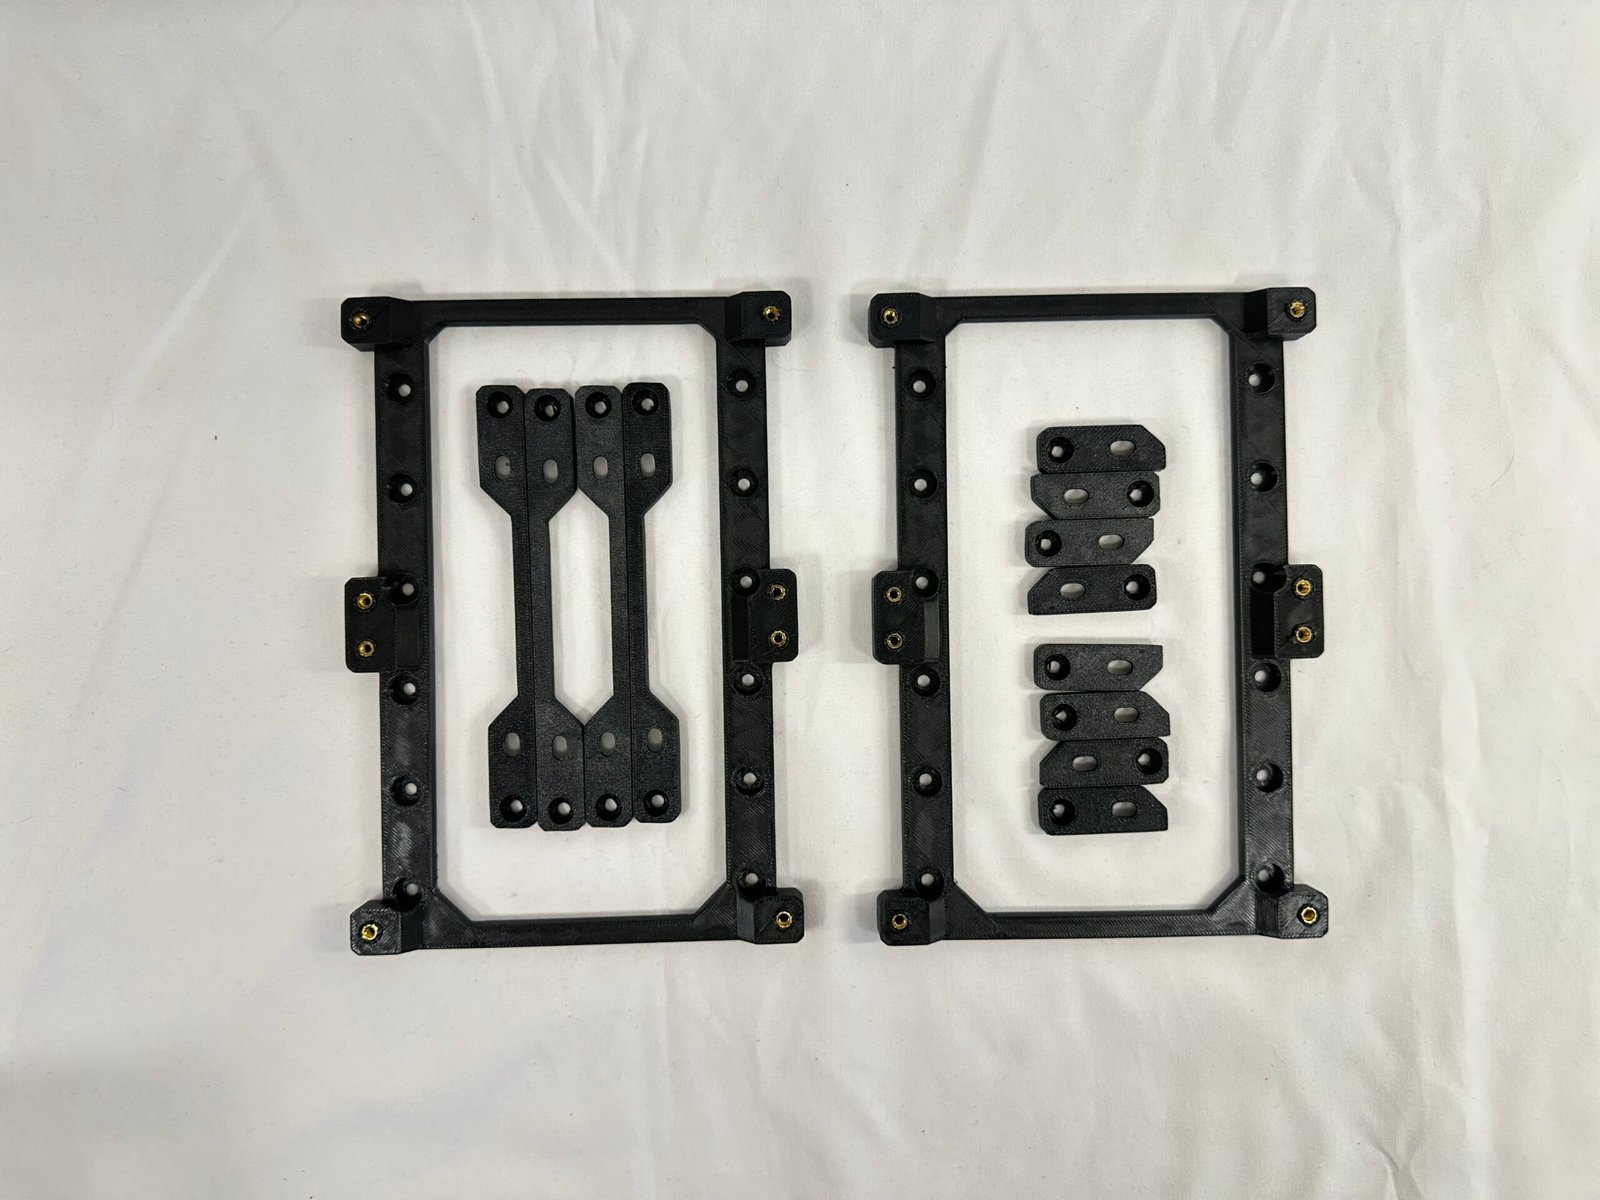
Lay out the frame sections, motherboard tray, support arms and brackets before starting.
This product is comprised of 3x type of main components:
- 2x Storage drive mount panels
- 4x Long 90mm fan adapter brackets
- 8x Small 90mm fan adapter brackets
1
STEP 1
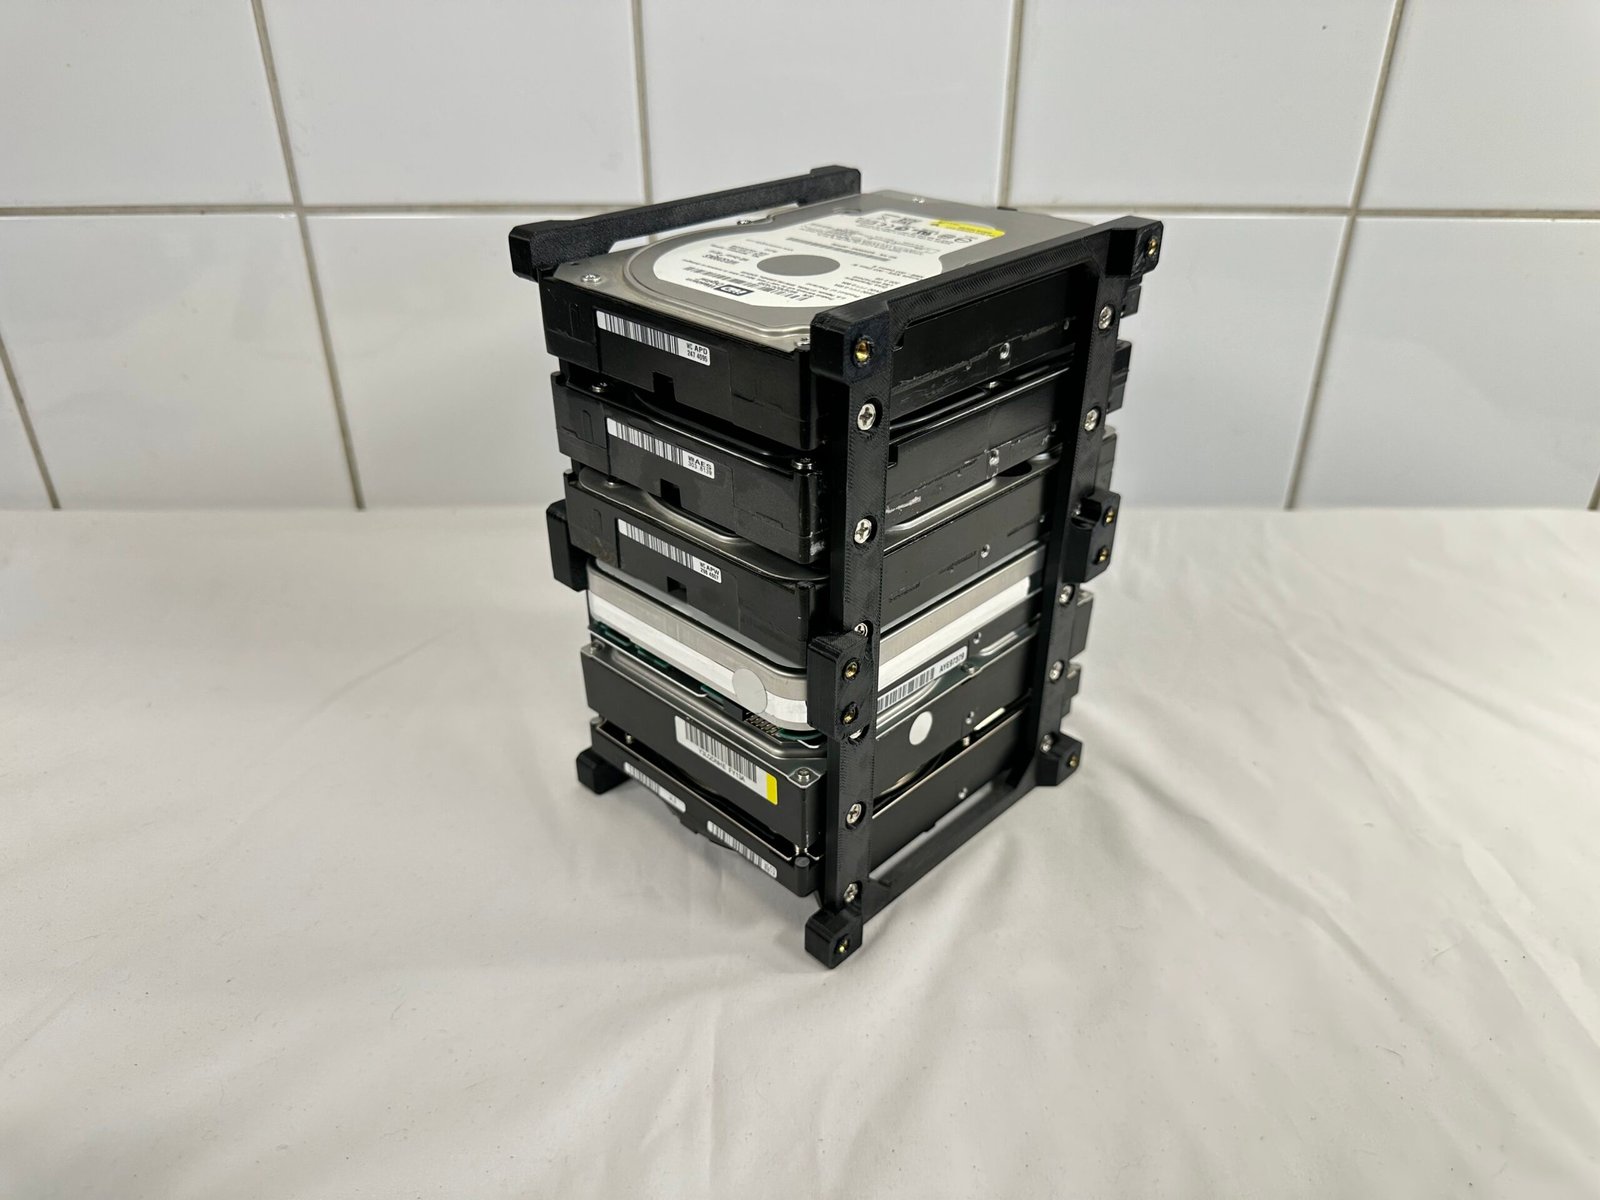
Assemble storage drives with panels
Instructions
- Begin by aligning the screw holes of a single storage drive with the bottom screw holes of 1x of the Storage drive mount panels.
- Secure the Storage drive to the panel by using 2x M3 screws for SSDs/SASs or 2x 6/32 screws for HDDs.
- Repeat until you’ve installed all drives to the first panel.
- Turn the assembly and place it on a flat surface, with the panel down.
- Align your 2:nd panel to the screw holes of the storage drives.
- Secure each storage drive to the 2:nd panel by using 2x M3 screws for SSDs/SASs or 2x 6/32 screws for HDDs.
Hardware used
SSD/SAS only: 32-64× M3 screws (Only 32x included)
HDD only: 16x 6/32 screws
Tip
- It’s recommended to do this assembly in a well-lit area with a flat surface.
- Allign the storage drive’s I/O to face the same direction.
2
STEP 2
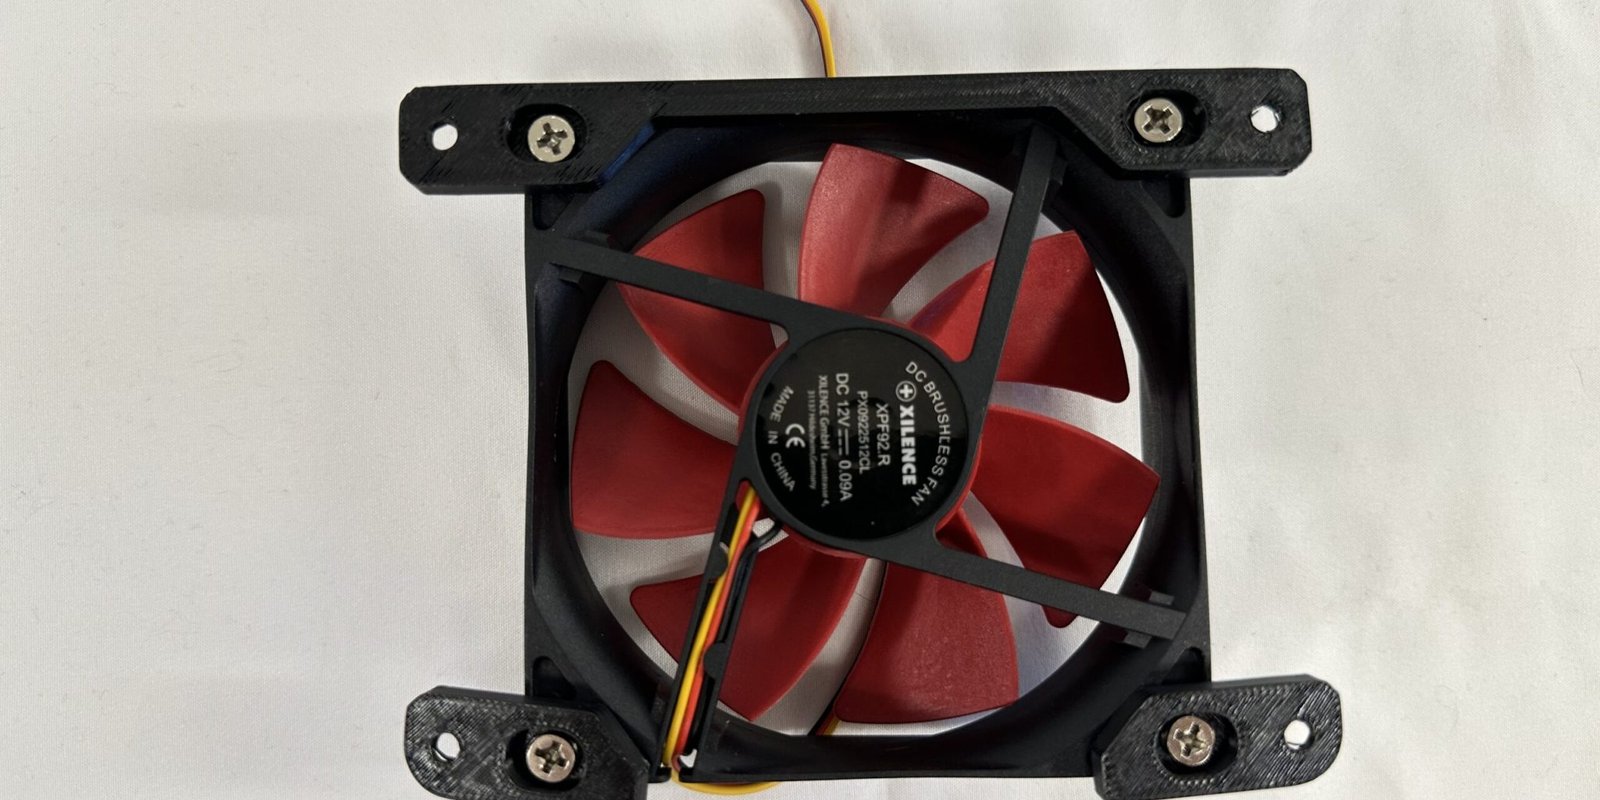
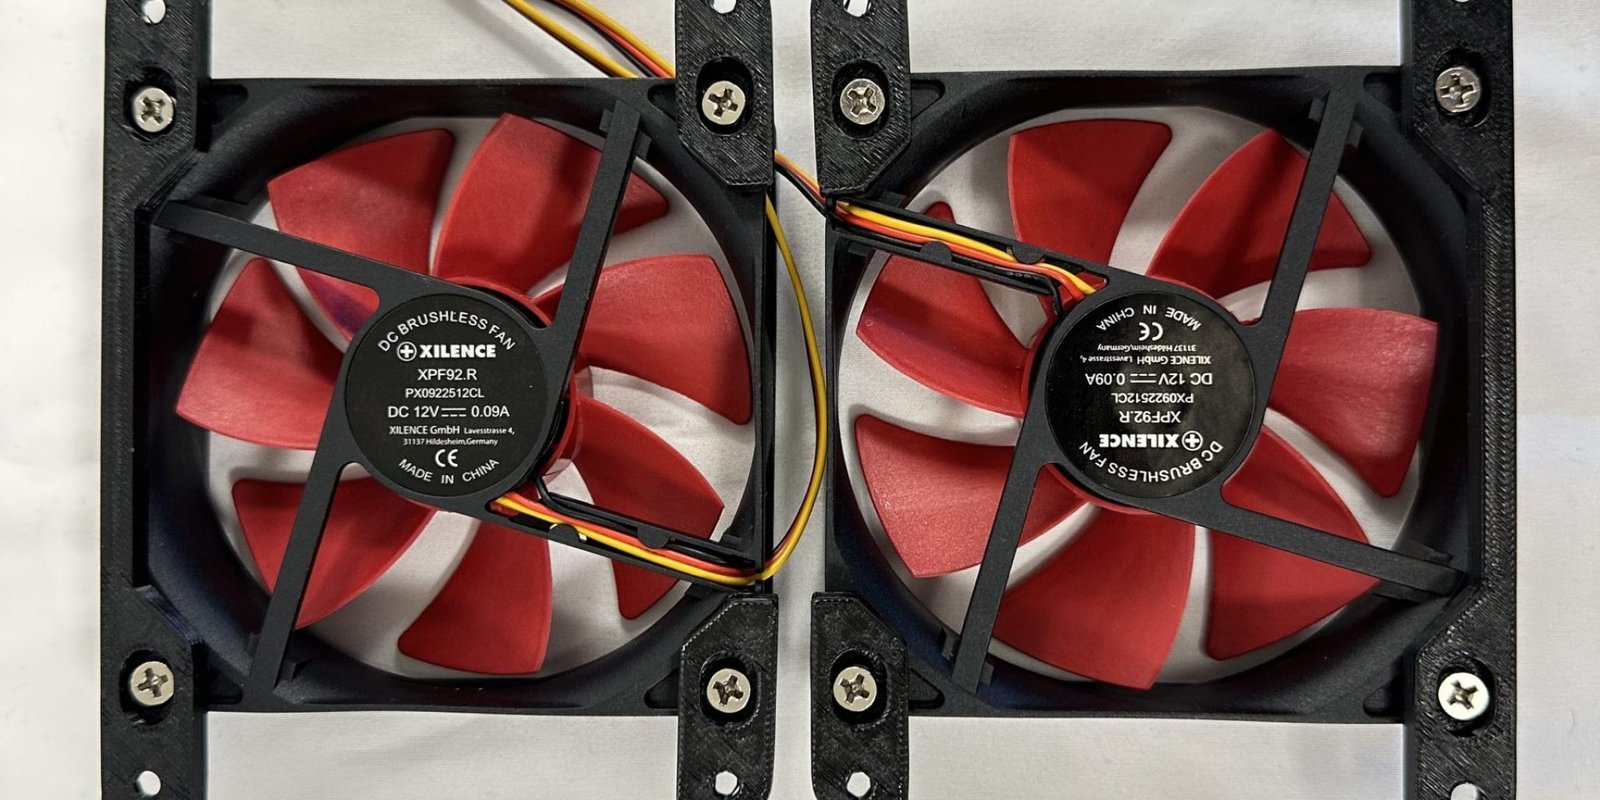
Install fan adapater to fans
Instructions
- Place a 90mm fan on a flat surface, on the side of choice.
- Align the inner screw holes of a long fan adapter to the top screw holes of the fan, with the ridges down towards the fan’s center.
- Repeat the process with 2x small fan adapter brackets. (Make sure that the rounded side of the small fan adapters are point away from the fan, like in the image.)
- Secure all adapters to the fan with 4x fan screws.
- Repeat this process for each fan you plan to install.
IMPORTANT!
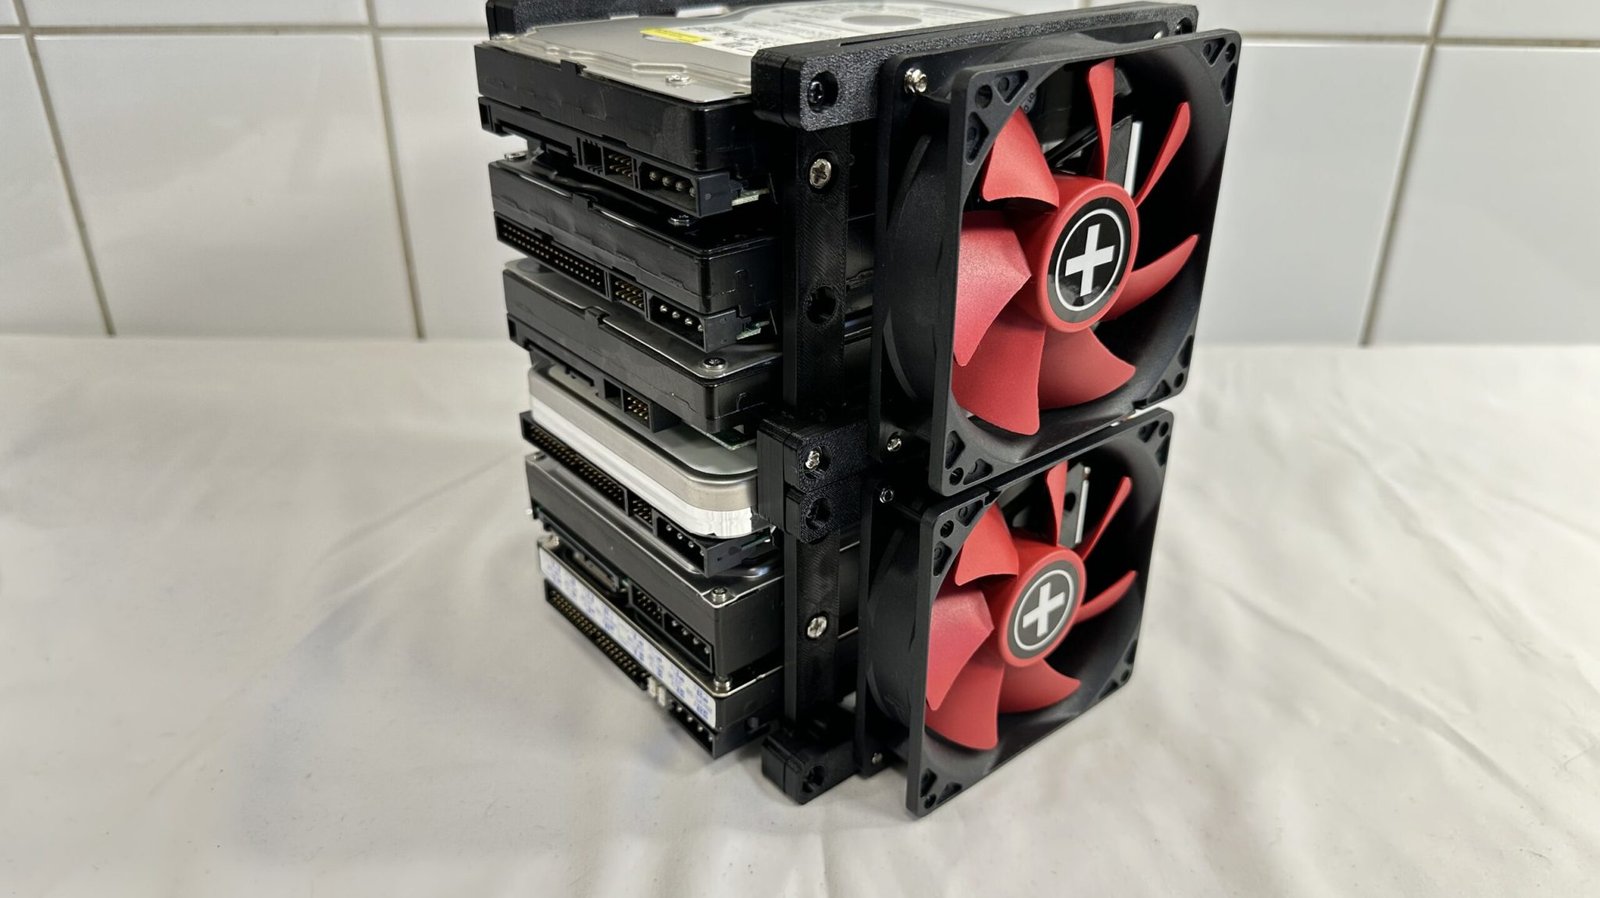
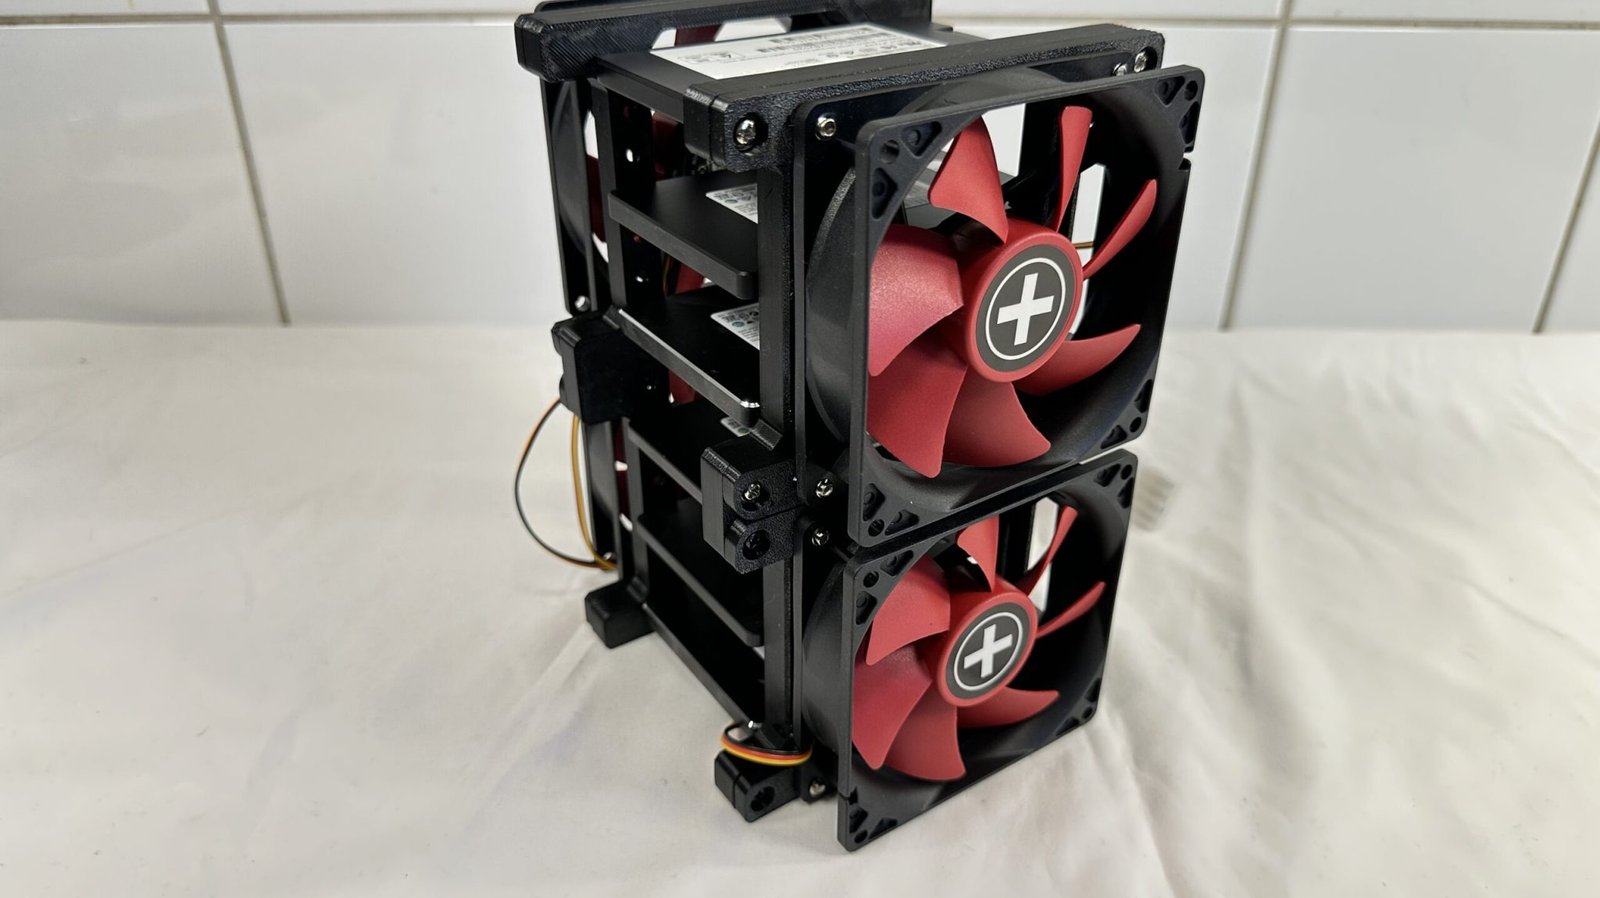
Install the fan adapters to the fans in such a pattern that you have 2x fans sucking air into the rack, and the other 2x fans blow the air out to achieve optimal cooling after installing all 4x fans to the rack.
Hardware used
4-16× Fan screws (not included)
Tip
There are indentations on each of the fan adapters to help secure them to the fans & to the rack later on.
3
STEP 3
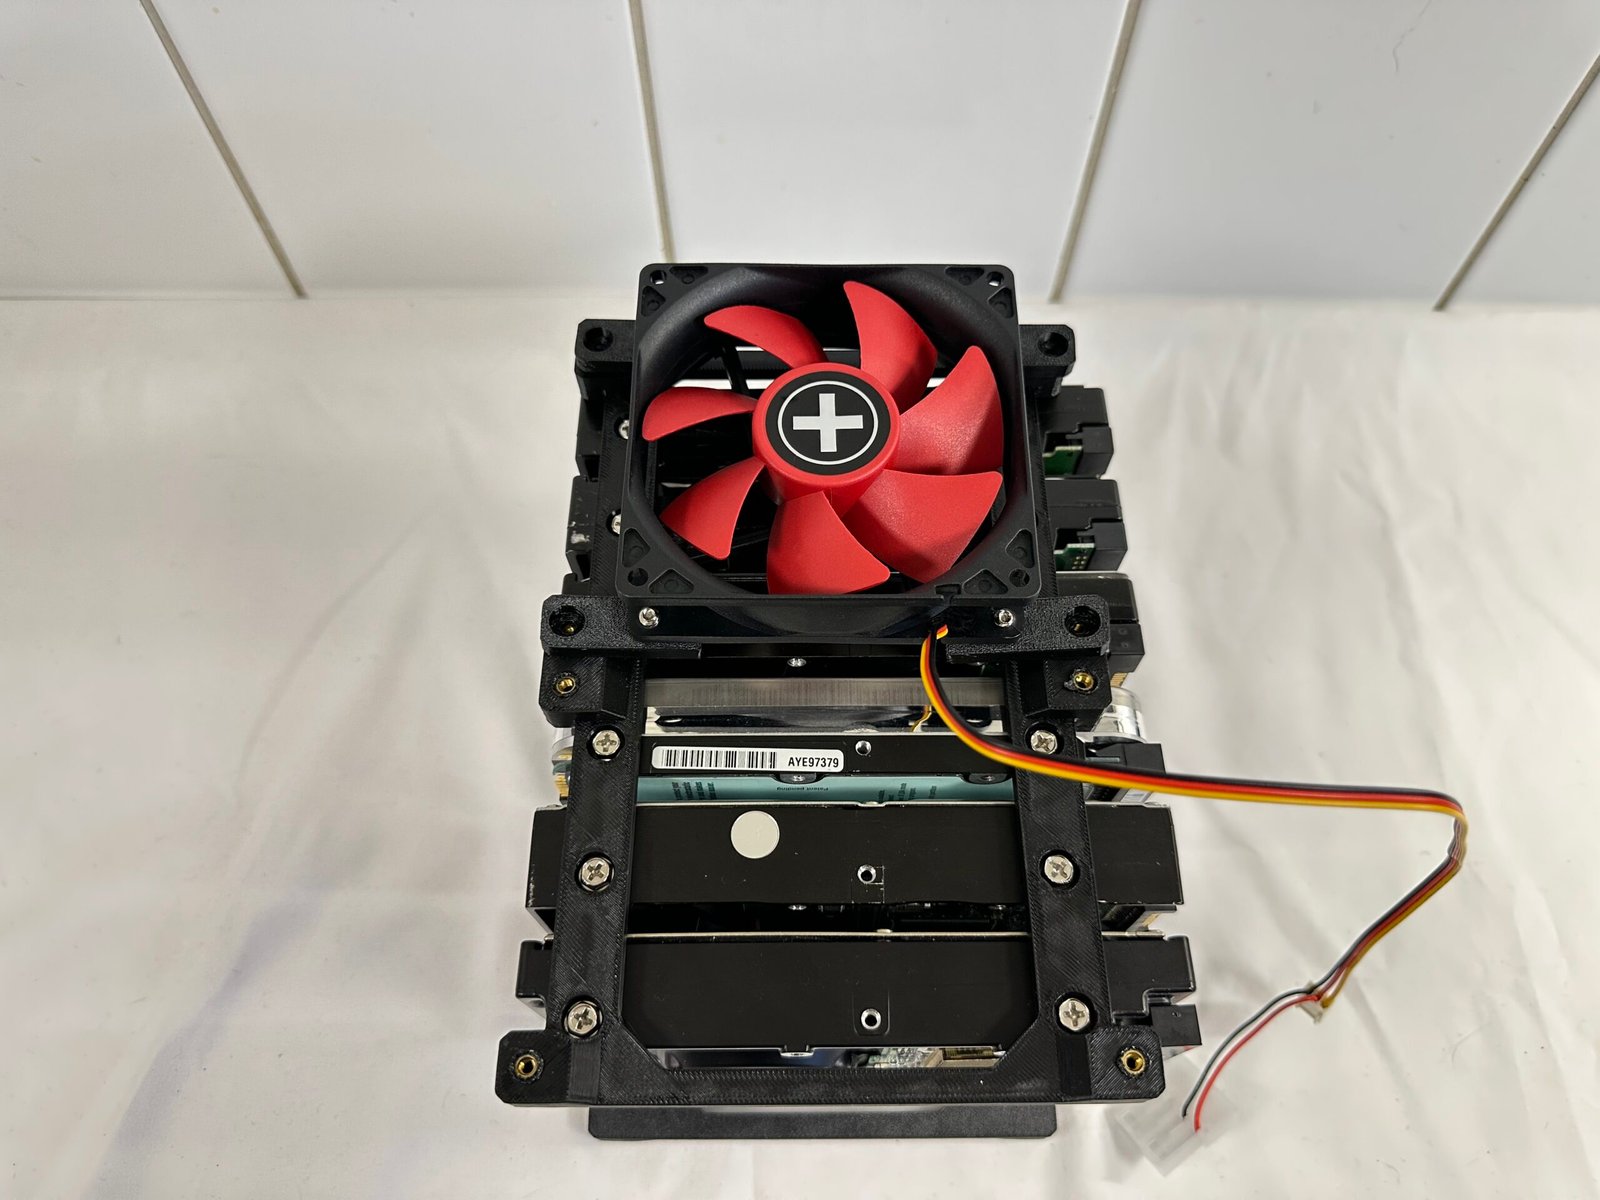
Install assembled fans to rack
Instructions
- If the storage drive rack is standing up-right: Place it on top of one of its panels.
- Place a fan, with fan adapters installed, on top of the rack and align it to the metal inserts the sides on the rack.
- When in place: Secure the fan assembly with 4x M3 screws.
- Repeat the process for the next fan on that side of the panel.
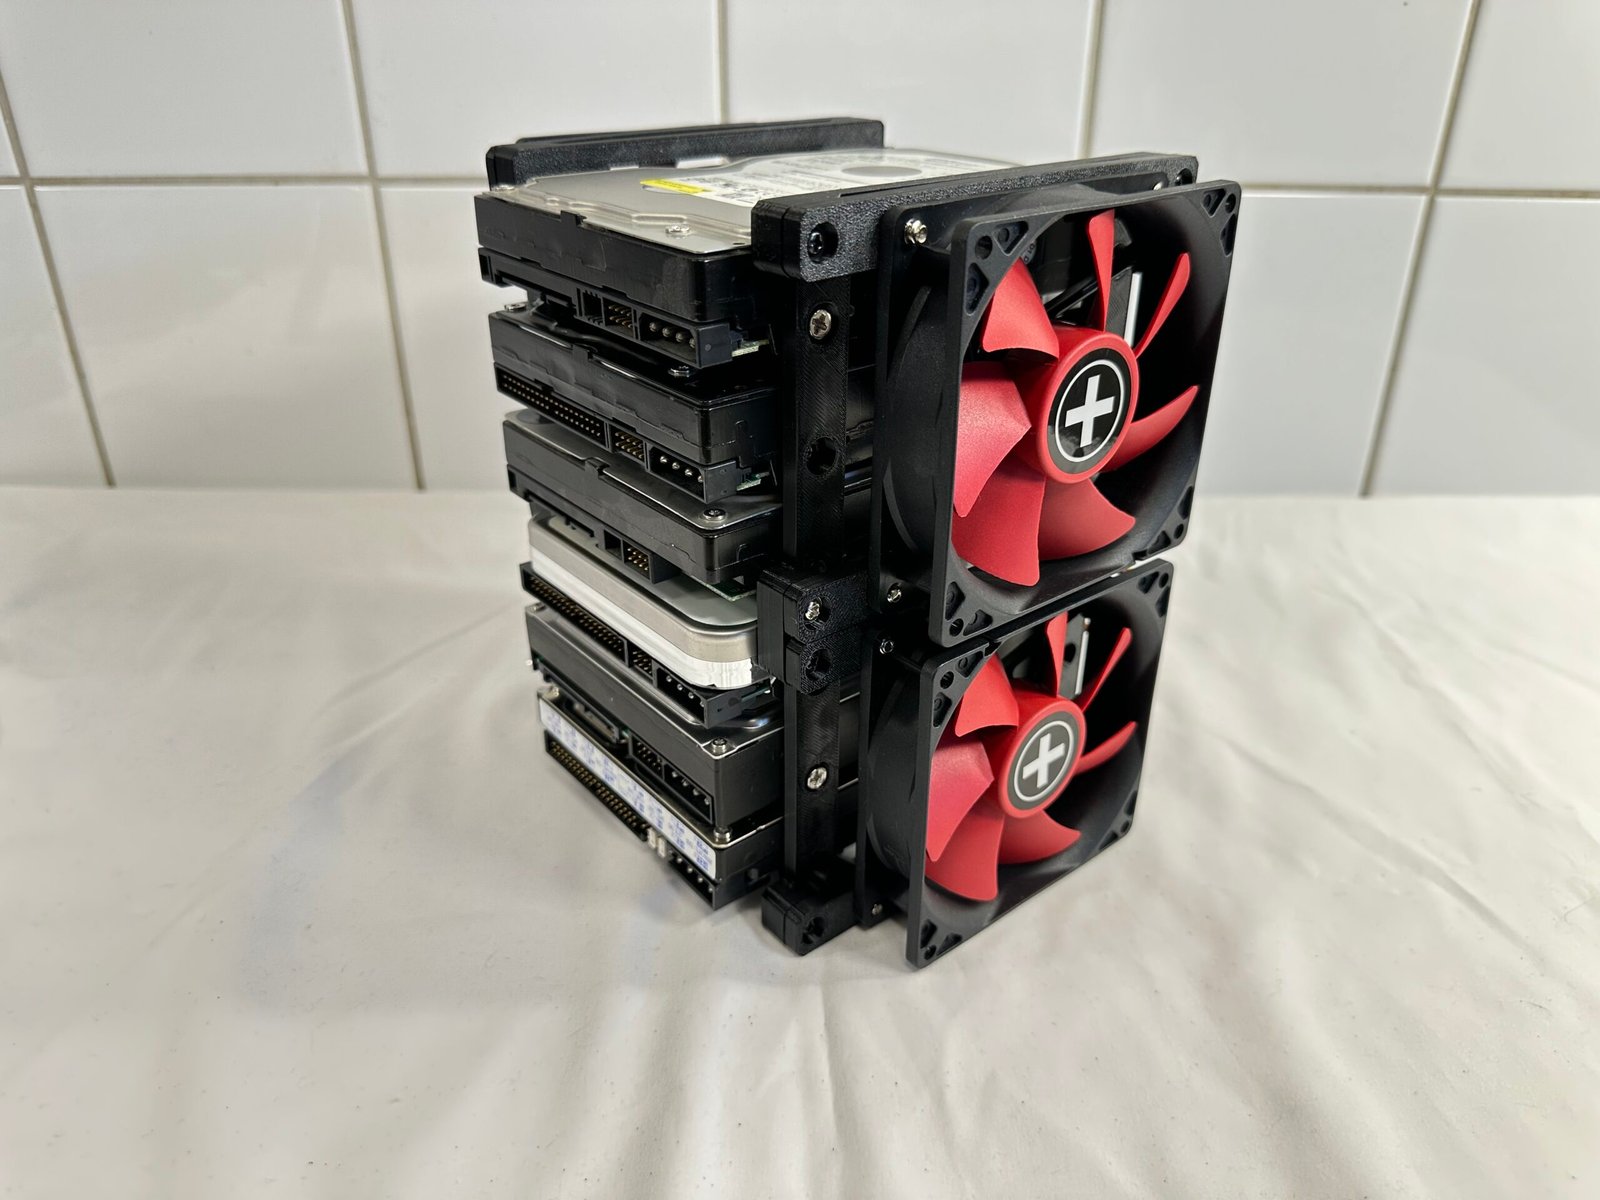
- Turn the rack around to the opposite side to install the 2x remaining fans.
IMPORTANT!
Make sure that you have installed the fan adapters to the fans in such a pattern that you have 2x fans sucking air into the rack, and the other 2x fans blow the air out to achieve optimal cooling after installing all 4x fans to the rack.
Hardware used
16x M3 screws
Tip
It’s recommended that you install the assembled fans to the rack with the small fan adapters pointing inwards to the rack’s center.

FINAL CHECKPOINT
Inspect the complete assembly
- All frame screws are evenly tightened.
- Storage drives are securely mounted and ventilated.
- No cables are touching fans or sharp edges.
SUPPORT
Need help with your assembly?
Is the instruction wrong or misleading? Perhaps you have a suggestion? We’d be delighted to hear from you regardless!